
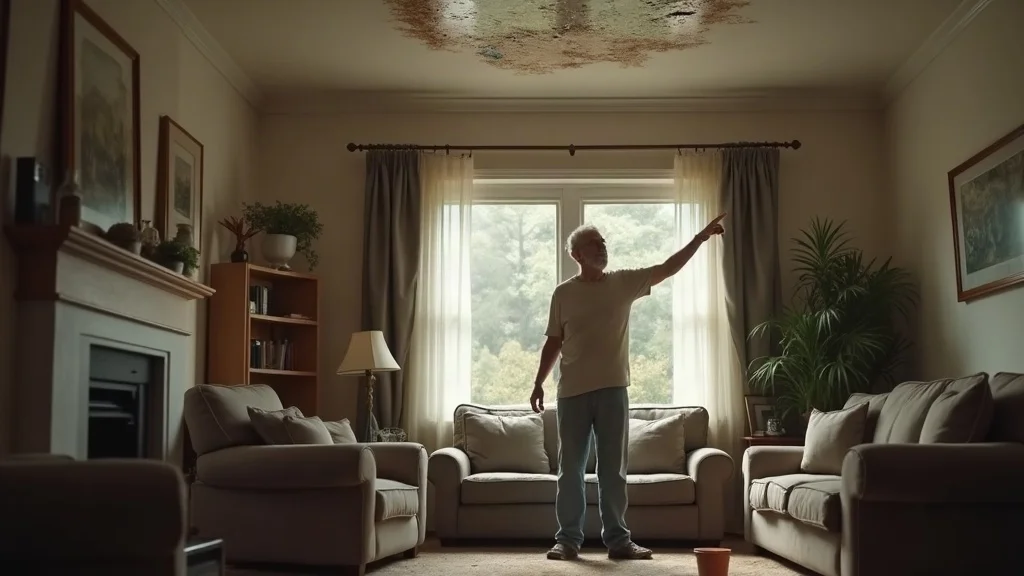
Imagine standing in your cozy living room, only to spot an unfamiliar water stain creeping across your ceiling after a rainy night. You climb up for a closer look—only to find rainwater slowly dripping from overhead, pooling ominously into a bucket below. This is a homeowner’s worst nightmare, often triggered by one small but critical oversight: ignoring the health of your roof flashing. Roof flashing replacement isn’t just technical jargon—it’s your front line of defense against expensive repairs, hidden leaks, and long-term water damage.
Why Understanding Roof Flashing Replacement Explained Matters for Homeowners
For many homeowners, the idea of roof flashing replacement explained may seem complex, but it is vital knowledge for protecting the integrity of your home. Flashing is a thin material—most commonly made from resilient metal flashing—installed wherever your roof meets a vertical surface like a chimney, dormer, or exterior wall. Its job is to direct water away from areas that are especially vulnerable to leaks, effectively sealing joints and preventing moisture from sneaking beneath your shingles or exterior wall covering. A compromised flashing system is a leading cause of water damage and can result in warped ceilings, rotten wood, and interior mold, often before any exterior sign becomes visible.
When overlooked, damaged flashing allows for a direct water path into your home, causing hidden destruction that may only be discovered after significant issues arise. Homeowners who understand how flashing works, the warning signs of a flashing problem, and the process of timely roof flashing replacement can prevent minor leaks from becoming catastrophic. Mastering roof inspections and keeping an eye on your roof’s vulnerable areas—like step flashing, headwall flashing, and pan flashing—can make the difference between a simple repair and a complete roof replacement. In short, being proactive about your roof flashing replacement explained is one of the smartest ways to maintain your home’s value and comfort.
Observational Scenario: When Overlooked Roof Flashing Replacement Leads to Water Damage
Picture a typical shingle roof where rusty, deteriorated flashing lines the seams where the roof meets the chimney and the exterior wall. After a week of persistent rain, water starts seeping through a small gap—barely noticeable to the untrained eye. Moisture trickles down inside the exterior wall, staining drywall and quietly saturating insulation. By the time a musty odor is detected inside the living room, water damage has already set in, threatening the remaining life of both the interior finish and the underlying structure.
This scenario underscores how overlooking roof flashing replacement can have serious consequences. Small cracks or loose sections in your flashing can quickly widen as moisture, freeze/thaw cycles, and wind degrade pan flashing, step flashing, and even metal flashing. What begins as a minor oversight can escalate to structural rot or an attic filled with unseen mold. The result? Costly repairs and sometimes a full replacement of your roof system. By having regular roof inspections and maintaining your flashing, you can avoid this all-too-common homeowner headache.
What You’ll Learn About Roof Flashing Replacement
-
Key concepts of roof flashing replacement explained
-
Types of roof flashing and materials
-
Signs of common roof flashing problems
-
Step-by-step roof flashing installation guide
-
DIY roof flashing replacement vs professional service
-
Roof leak prevention and maintenance tips
Roof Flashing Replacement Explained: The Foundation of Leak Prevention
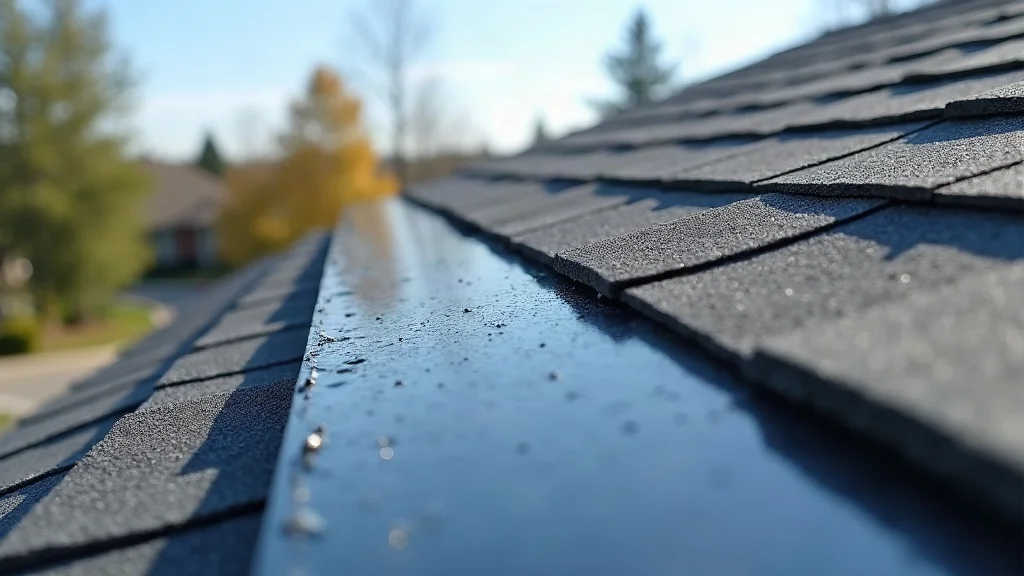
At the heart of every watertight home lies one crucial detail: expertly installed roof flashing. Flashing works discreetly with your shingle roof and other roofing materials to create a continuous barrier against water intrusion. Wherever the roof meets an exterior wall, chimney, vent, or dormer, flashing redirects rainwater and melted snow—ensuring any roof leak never gets a chance to follow the inevitable water path through your layers of asphalt shingle and underlayment toward indoor spaces.
With each rainfall, water naturally seeks the shortest route down and around roof edges, often testing every seam and vulnerable transition. Quality metal flashing such as aluminum, copper, or galvanized steel, brings exceptional impact resistance and longevity, delivering an investment in peace of mind that far outweighs the cost of major roof leak repairs. By having your roof flashing replacement explained and performed with precision, homeowners ensure that both new and aging roofs gain robust, long-term protection. Proper flashing doesn’t just seal out water—it extends the life of your complete roof, shields against invasive mold, and safeguards everything under your sheltering shingles.
How Roof Flashing Protects Your Shingle Roof from Water Damage
On shingle roofs, flashing acts like armor for your home’s most susceptible spots—where the flat or sloped plane meets a vertical rise, like a wall or chimney. Water running down your shingle roof will always seek a way in, but flashing redirects this water path, pushing moisture away from vulnerable joints and seams. Flashing is especially important on low-slope or intricate roof designs, where pools of water or snow can quickly find their way below a poorly sealed barrier.
The effectiveness of roof flashing replacement comes down to materials, fit, and craftsmanship. On an asphalt shingle roof, properly installed step flashing and pan flashing overlap for added defense, creating a built-in “zig-zag” that forces water to shed off safely. Even the best shingles cannot compensate for a break in metal flashing; without proper flashing, water easily creeps between asphalt shingle layers and exterior wall covering, often leading to rapid, hidden water damage. This is why routine roof inspection and professional replacement are essential to prevent minor flashing issues from spiraling into severe—and costly—repairs.
Types of Roof Flashing: Materials and Applications Explained
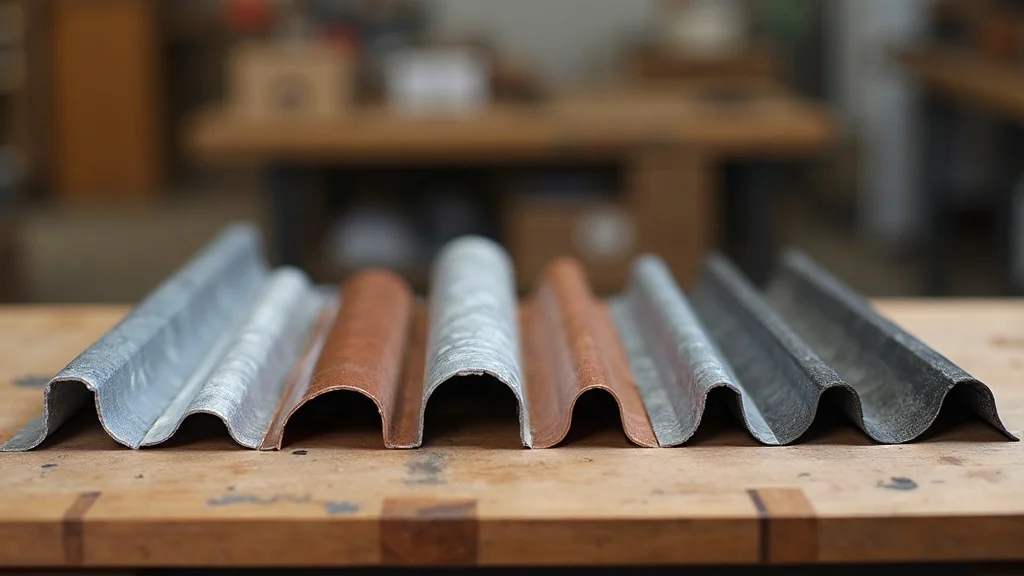
Roof flashing isn’t one-size-fits-all; several types and materials offer varying performance and visual benefits. Metal flashing options like aluminum, copper, and galvanized steel are popular for their impressive impact resistance, durability, and sleek appearance. Non-metal alternatives, such as rubber or high-grade plastics, may be used in specific, less-exposed locations, but metal remains the gold standard for complete roof protection—especially on shingle roofs and wherever rooftop equipment or complex roof intersections exist.
Flashing is tailored for each application—think step flashing along exterior walls, headwall flashing at vertical terminations, or pan flashing beneath rooftop equipment. The right choice depends on your roof’s architecture, the surrounding roof conditions, and your climate. Selecting proper flashing materials and methods is the first step toward mastering roof inspections and ensuring your roof’s longevity. When considering roof flashing replacement explained, understanding these options helps you partner effectively with your roofing professional.
Comparing Metal Flashing and Other Roof Flashing Materials
Metal flashing is favored for its robust performance. Aluminum offers lightweight rust resistance, perfect for humid climates and most asphalt shingle installations. Galvanized steel brings extra strength and affordability, though it may eventually corrode if left untreated. Copper, renowned for its natural beauty and durability, develops a striking patina and resists corrosion for decades—making it ideal for historic or luxury homes. Meanwhile, rubber and plastic flashings work for specific uses, such as vent pipes, but generally lack the longevity and structural benefits of their metallic counterparts.
When it comes to roof flashing replacement explained, the complete roof ecosystem determines the best material for each location. Surrounding roof conditions and the presence of neighboring exterior wall coverings play a key role, as do factors like impact resistance and local weather. While certain alternatives may be cost-effective for secondary spots, most professionals recommend metal flashing—even on shingle roofs and around rooftop equipment—for the best return on investment and home protection.
Selecting Roof Flashing for Shingle Roofs and Other Roofing Systems
Shingle roofs frequently rely on overlapping step flashing, headwall flashing, and sidewall flashing to seal every potential water path along complex edges and valleys. For asphalt shingle roofs, metal flashing provides a seamless integration, maintaining the flexibility and durability required to withstand years of rain, wind, and thermal movement. Homeowners should partner with roofing professionals who understand which flashing type is right for each exterior wall or shingle roof scenario, rather than relying on “one size fits all” fixes.
Other roofing systems—such as tile, metal, or rubber—call for customized flashing solutions. For example, tile roofs may utilize pan flashing at valleys and custom-fitted metal flashing around protrusions. Roofing sealant can provide a temporary fix but should never replace a proper flashing installation. Knowing the strengths of each flashing type, and matching them to your home’s roofing materials—including asphalt shingle, metal, and beyond—significantly extends the remaining life of your complete roof while preventing leaks at critical transitions.
Common Roof Flashing Problems: Signs and Solutions
-
Cracked or corroded metal flashing
-
Loose or missing flashing components
-
Improper roof flashing installation
-
Water stains and interior leaks
Typical signs that your roof flashing replacement is overdue include visible rust, corrosion, warping, or cracks in the metal flashing itself. Water stains along walls or ceilings, particularly near chimneys or vents, hint at a compromised seal. Sometimes, improper installation may leave sections unsecured—allowing wind or pests to lift flashing and create direct pathways for moisture. Any missing, bent, or visibly deteriorated flashing should trigger a call for a professional roof inspection.
If you spot recurring dampness, or find evidence of interior leaks, your flashing could be the culprit. Addressing these early can make the repair more affordable and avoids the domino effect of water damage—a must for anyone hoping to avoid a full replacement of roofing and wall materials. Always trust a qualified roofing professional to diagnose and solve these flashing problems before secondary damage sets in.
Roof Flashing Inspection: How to Detect Issues Before They Cause Damage
Mastering roof inspections means regularly checking each flashing area for cracks, gaps, or signs of wear. Carefully inspect the points where roofing meets walls, chimneys, or rooftop equipment. Look for lifted, rusted, or split metal, as well as gaps where the flashing meets either the shingle roof or adjacent wall covering. Pay special attention to step flashing and headwall flashing on shingle roofs, as these are common spots for leaks to begin.
A well-timed inspection can reveal small issues before they allow water into your home. Most experts suggest at least annual roof inspections, and always after severe storms or significant weather events. Encroaching debris, loose nails or screws, and failed roofing sealant can all undermine even quality flashing over time. By keeping up with these inspections and promptly addressing discovered problems, you protect the longevity of your roofing system and interior finishes.
Mastering Roof Inspections: Step-by-Step Guide for Homeowners
1. Start with a safe exterior inspection. From the ground, look for any misaligned shingles, rust streaks, or exposed flashing along the roofline, dormers, and around chimneys.
2. Examine vulnerable joints and seams. Using a ladder, check areas around skylights, vent pipes, and all wall-roof intersections for obvious gaps or corroded flashing.
3. Check attic spaces for water stains. Interior inspection can reveal early moisture, suggesting a breach in your flashing or roofing sealant—especially near chimneys and valleys.
4. Look for encroaching debris or damage. Leaves, twigs, and windblown material can hide damaged flashing or loosen the seals, undermining even the best installation.
Document your findings and, when in doubt, schedule a professional roof inspection to verify the integrity of your roof flashing installation.
| Comparison of Roof Flashing Types, Materials, Longevity, and Application | |||
| Flashing Type | Material | Expected Longevity | Common Applications |
|---|---|---|---|
| Step Flashing | Aluminum, Galvanized Steel | 20–30 years | Where roof meets walls (e.g., along chimneys, exterior wall) |
| Pan Flashing | Copper, Galvanized Steel | Up to 50 years (copper) | Valleys, roof-to-roof intersections |
| Headwall Flashing | Aluminum, Copper | 20–50 years | At head joints (e.g., where roof terminates into vertical wall) |
| Rubber or Plastic Flashing | Synthetic Materials | 10–20 years | Pipes, vents, less exposed openings |
Roof Flashing Replacement Process Explained: What to Expect
-
Initial roof inspection and identifying flashing problems
-
Removing old or damaged roof flashing
-
Choosing and applying new roof flashing materials
-
Ensuring proper installation to prevent water leaks
-
Final roof inspection and site clean-up
When it’s time for roof flashing replacement explained, expect a straightforward, five-step process executed by skilled professionals. First, a comprehensive roof inspection targets weak points and deteriorated flashing. Old materials are carefully removed, preventing damage to surrounding roof or wall coverings. Next, your roofer selects the highest-quality metal flashing or other materials suited for your specific roof, ensuring proper fit and long-term protection.
The new flashing is installed according to best practices—overlapping each piece for consistent water deflection, securing them with corrosion-resistant fasteners, and sealing all seams with approved roofing sealant. After a meticulous final inspection, the work area is thoroughly cleaned, so your home and yard look just as tidy as before. This structured approach guarantees your complete roof system is both beautiful and resilient.
How to Replace Roof Flashing: DIY Steps vs. Professional Help
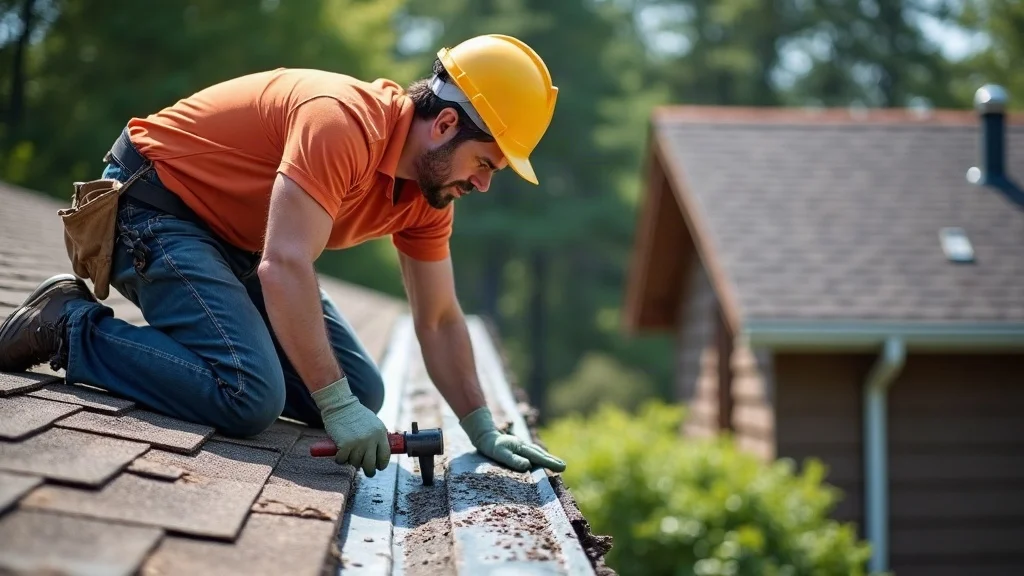
While the adventurous homeowner might consider a DIY roof flashing replacement explained—especially for minor repairs—professional service almost always ensures a lasting result. The DIY route typically involves purchasing step flashing or pan flashing, precisely measuring and cutting, and delicately removing and replacing the affected areas without harming shingles or wall covering.
However, mistakes during installation—like incorrect overlap of flashing, inadequate fastening, or improper use of roofing sealant—can result in persistent leaks and even void your roof’s warranty. For chimney, headwall flashing, or extensive repairs on shingle roofs, a local roofing professional ensures both the new and surrounding roof materials are handled expertly. Your repair makes sense when done right the first time; sometimes, what appears to be a minor fix uncovers hidden rot or necessitates a full replacement. Don’t risk your home’s structural integrity—when in doubt, seek a professional.
“Proper roof flashing replacement explained by local experts helps you avoid unnecessary repairs and long-term damage.” – Brian Dawson, Owner
Roof Flashing Maintenance Explained: Tips for Longevity and Leak Prevention
-
Regular roof flashing inspection
-
Cleaning debris from roof and flashing
-
Sealing cracks or gaps in roof flashing
-
Knowing when replacement is necessary
Routine maintenance is key to maximizing the life of your flashing and overall roof system. Start by scheduling annual roof inspections and keep your roofline clear of leaves, sticks, and other debris that can trap moisture and accelerate corrosion. Pay attention to any small cracks or gaps—quickly sealing these with roofing sealant can help prevent major leaks until a more thorough replacement can be arranged.
If you notice any irregularities in your roof’s flashing, such as detachment, visible rust, or persistent leaks beneath or around exterior walls, don’t delay in addressing these. Identifying when replacement makes sense ensures you stop water damage before it starts, keeping your asphalt shingle or other roof materials performing as intended. Regular upkeep and rapid response are the surest paths to a long-lasting, leak-free home.
Frequently Asked Questions about Roof Flashing Replacement
Is $500 expensive to replace roof flashing?
The cost to replace roof flashing can vary depending on the extent of the job, materials used (like metal flashing), and whether it’s a partial repair or a full replacement. In many cases, $500 is within a typical range for straightforward repairs, especially if only a small area around a chimney or exterior wall is involved. However, complex situations or large-scale flashing problems may require a higher investment, especially on a complete roof or when addressing hidden water damage.
How often should roof flashing be replaced?
Roof flashing should last as long as your shingles—often 20–30 years with quality metal flashing on a shingle roof. However, frequent roof inspections may reveal the need for replacement sooner, especially if flashing is cracked, corroded, or improperly installed. Major storms, fallen debris, or nearby repairs can all shorten the remaining life of your flashing, so regular professional evaluation is key to timely replacement and avoiding roof leak risk.
What is the average cost to replace roof flashing?
The average cost of roof flashing replacement depends on the size of the affected area, the type of metal flashing or other materials used, and regional labor rates. Smaller repairs—such as step flashing on a single exterior wall—may be quite affordable, while replacing flashing across the entire roof, or correcting an extended water path of damage, increases cost. For an exact estimate, it’s best to schedule a professional roof inspection, as they can determine both the scope of work and whether a repair makes sense or a full replacement is needed.
Does roof flashing go under or over shingles?
Proper installation of roof flashing requires the flashing to be woven between shingle layers—typically, step flashing is placed under a new shingle course and over the one below, creating a continuous water shield. Headwall and pan flashing are installed under the wall covering but over the underlayment, ensuring that water never finds a path beneath. This careful arrangement is essential for both shingle roofs and other roof types to prevent leaks and extend your roofing system’s life.
Key Takeaways: Roof Flashing Replacement Explained
-
Roof flashing replacement explained as crucial for leak prevention
-
Regular inspections help spot roof flashing repair needs early
-
Quality materials like metal flashing offer long-lasting protection
-
Professional installation prevents costly roof and water damage

Choose a Trusted Local Roofer for Roof Flashing Replacement
Selecting a reliable local roofing contractor ensures your roof flashing replacement explained is done right from inspection through clean-up. At Brian Dawson Roofing, every project—no matter the size—is meticulously inspected and completed to the highest standards. Local teams understand the unique climate and challenges of St. Louis, St. Charles, and Lincoln Counties, offering peace of mind and accountability that fly-by-night companies simply can’t match.
“With Brian Dawson Roofing, every project is expertly inspected and guaranteed for your peace of mind.”
Contact Us for Professional Roof Flashing Replacement
Contact us athttps://briandawsonroofing.com/contact/or call us at(636) 465-9465
Protect your home from costly leaks and water damage—schedule your roof flashing replacement explained assessment today. Our certified, fully insured team is ready to help you from inspection to installation and beyond.
Conclusion: Stay ahead of roof leaks and water damage with timely flashing inspections and expert replacement. Contact your local professionals for trustworthy service and lasting results.